How to Install Artificial Turf

Project Considerations
- Always stretch and install turf tight
- Do not overlap seams
- When nailing, be sure no blades or thatch is stuck under nail head
- Never drive nails into base too far (counter sink) as this will create a noticeable dip or divot
- Always run grain of turf in same direction
- For best look, point the grain of the turf in the direction from which the turf will be most often viewed.
EXAMPLE: For front yard installation, grain would point toward street. For back yard installation, grain would point toward house
Step 1: Preparing the Base
One of the most important steps in the installation of your artificial turf is the preparation of the base. You want to make sure you use the proper base material, that it is compacted properly; and that it is relatively smooth and even.
Excavate the Site:
Remove 3"–4" of existing sod and/or dirt. Be sure to set a rough grade for drainage. If irrigation system is present, the common step is to cap and/or remove any sprinklers.
Install & Compact Base Material:
Lay 3"–4" of either Class II Road Base or Decomposed Granite. Using a plate compactor, compact base to 95%. Be sure base surface is as level and smooth as possible. Create a slight grade for optimal drainage.
PET USE TIP: If pets will be using the area, spread a layer of Zeolite on top of the base at .5lb per sqft, and compact.
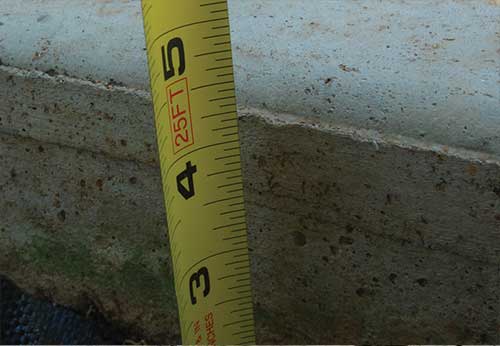
Excavate 3"–4"
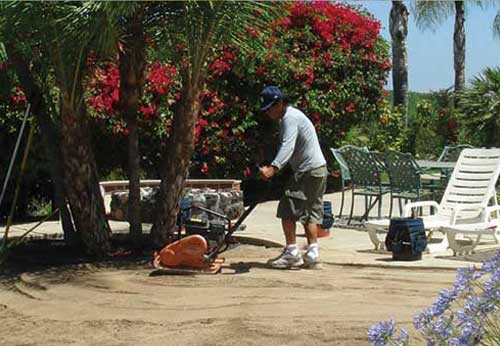
Compact the Base Material
Step 2: Installing Weed Barrier
In order to prevent weeds from taking root and growing up through your artificial lawn, it is suggested to install a fabric weed barrier beneath the turf installation (unless areas will be used by pets).
Install weed barrier (fabric), overlapping seams 6"–12". Secure to base with 20D nails or landscape staples.
PET USE TIP: If pets will be using the area to "do their business", it is suggested to NOT use weed barrier. Weed Barrier is made from a durable cloth-like fabric that will actually absorb and hold the urine, causing noticeable odor problems.
NOTE: (Optional) If an area where soil shifts or needs pumping when saturated with water, install weed barrier underneath base. By installing the barrier beneath the base, materials on top will retain better compaction integrity should such soil conditions exist.
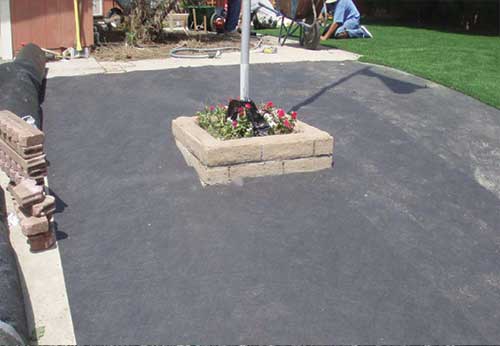
Install Weed Barrier
ARTIFICIAL GRASS FOR FOOTBALL, MT-MEMO-PLUS
Step 3: Acclimate the Turf
When the artificial turf is delivered, it will come in rolls. Being shipped and stored in this manner for a duration of time will cause the turf to hold an odd shape. This step is important in re-defining the memory of the turf and making it easier to work with.
Turf should be rolled out at least 2 hours before installation. Exposure to the sun as well as being laid out flat allows the artificial turf to acclimate, making it more flexible and easier to work with.
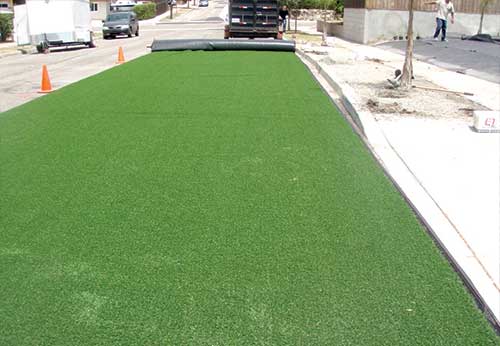
Acclimate the Turf
Step 4: Position and Trimming
In this step, you will roughly position and trim the turf in preparation of final installation. This will give you a general idea as to how the sections of turf will lay out.
How to Position the Turf:
Remove all dirt and debris from surface of weed barrier prior to turf installation. Lay turf onto base and position where needed. When positioning, be sure to lay the turf pieces so the grain, or direction of the blades on all pieces face in the same direction. This will help eliminate a patchy look and help hide seams.
How to Trim the Turf:
Using a razor knife, cut off salvage (the black and red part along the sides of the turf) - 3 stitches from the sides. Cut turf (cutting from the backside) to roughly fit in the desired area. It is a good idea to leave a bit of excess for any needed adjustments. This excess will be trimmed to fit during final positioning.
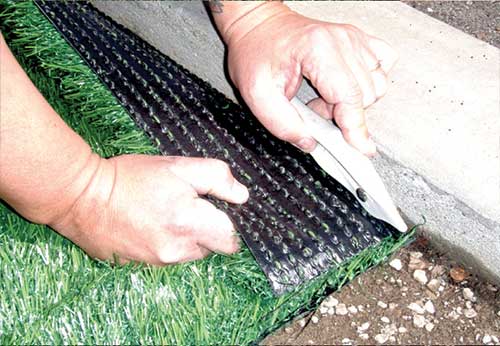
Trimming the Turf
Step 5: Securing the Turf
Once the turf is laid out and roughly cut to fit, it is time to begin securing it to the base, making final fitting trims, and connecting the different sections.
How to Fit, Tighten, & Secure the Turf:
Fasten one end of the turf with 60D nails, spaced 3"-4" apart. Stretch turf tight, and fasten with nails as you move across to the opposite end. Trim any perimeter edges to fit. Place a nail every 3"-4" along the perimeters and every 12"-24" throughout the field. Be careful to not drive the nails too deep, as this will cause dips and divots. Also, avoid any blades or thatch catching under the nail heads.
How to Connect Turf Seams:
Where two pieces of turf meet, fasten together the seams using nails spaced 1"-2" apart. Seaming tape, such as Jiffy Seal, can also be used to secure seams. To apply seaming tape, apply tape lengthwise to bottom side of turf, leaving 3" stuck to turf and 3" hanging off. Lay turf back down (Tape should be sticky-side up - Do not peal away liner.) Secure opposite piece of turf to tape. Be sure seams are tight and precise, and that the grain of your turf is all facing in the same direction.
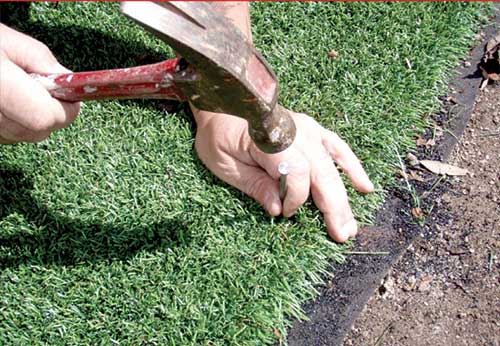
Securing the Turf with Nails
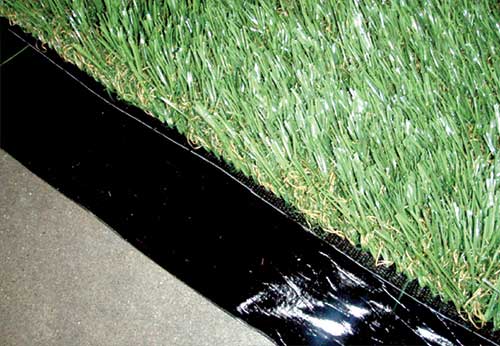
Securing Seams with Turf Tape
Step 6: Filling the Turf
It is finally time to fill the turf with Turf Fill and broom the entire area with a power broom. The fill will give the turf weight as well as help keep the blades of turf standing up.
How to Fill the Turf:
Once turf is tight and secure, power broom before in-filling to get the blades standing up as much as possible. Apply Turf Fill, and Zeolite Odor Control for pet applications, onto turf using a drop spreader. Apply in-fill as needed. If you don't have a spreader, shovels or wheel barrows can be used - Just be sure and spread the in-fill as evenly as possible. Please contact RCP for the proper amount of infill for your style of turf.
Final Touch:
Power broom again to spread the fill around and work it into the turf. Broom as much as needed to work in the in-fill and get the blades standing straight up.
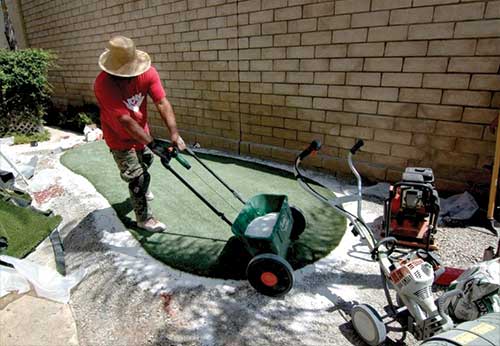
Adding Turf Fill and Zeolite (For Pets)
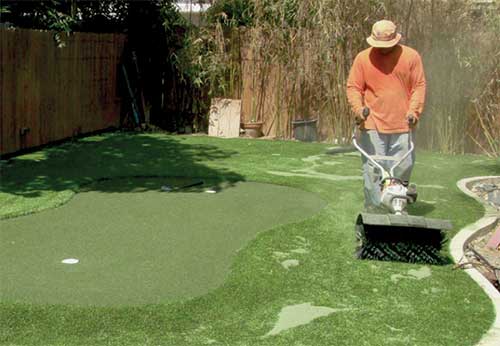
Power Broom Turf
With years of expertise in artificial grass, we're dedicated to providing eco-friendly, durable, and aesthetically pleasing solutions.
Our commitment to quality and customer satisfaction shapes every blade of grass we produce,
ensuring that we not only meet, but exceed,your landscaping expectations.

